Bot scenario scheme
Bot scenario scheme
Creating the variable 1
Creating the variable 2
Creating the variable 23
Flow list
Setting default flow
Question step adding
Editing Question step
Selecting a name variable
Adding age range options
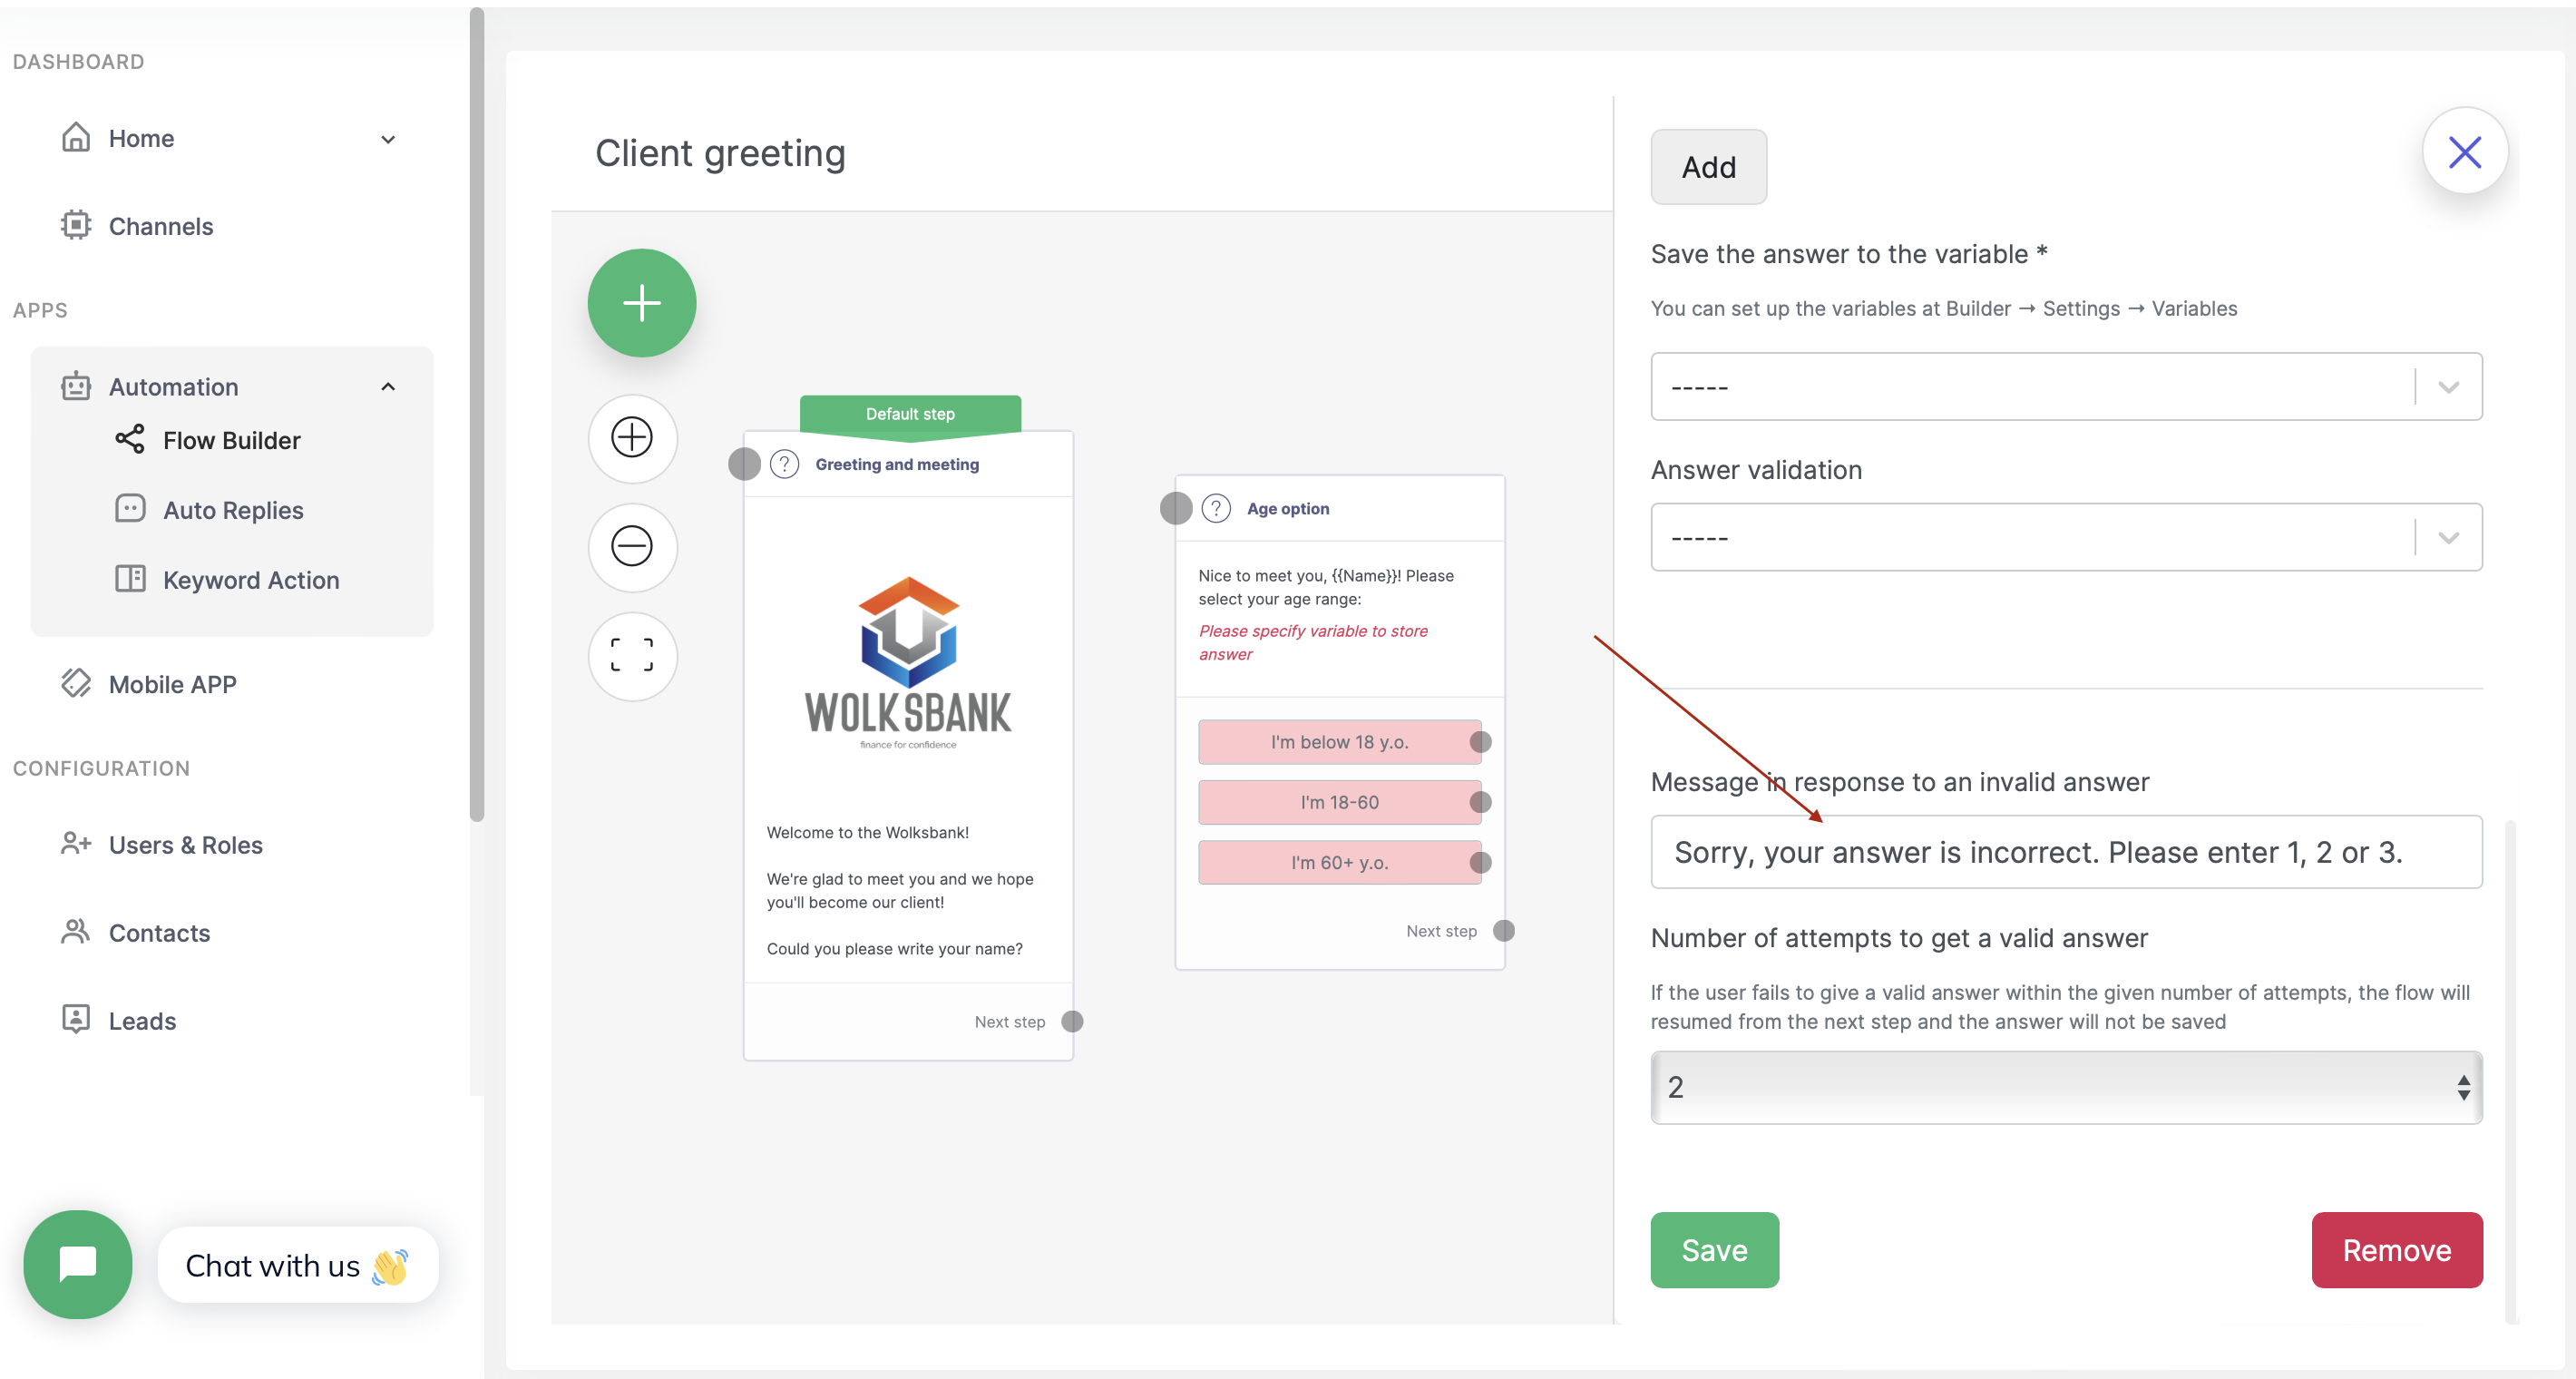
Error message
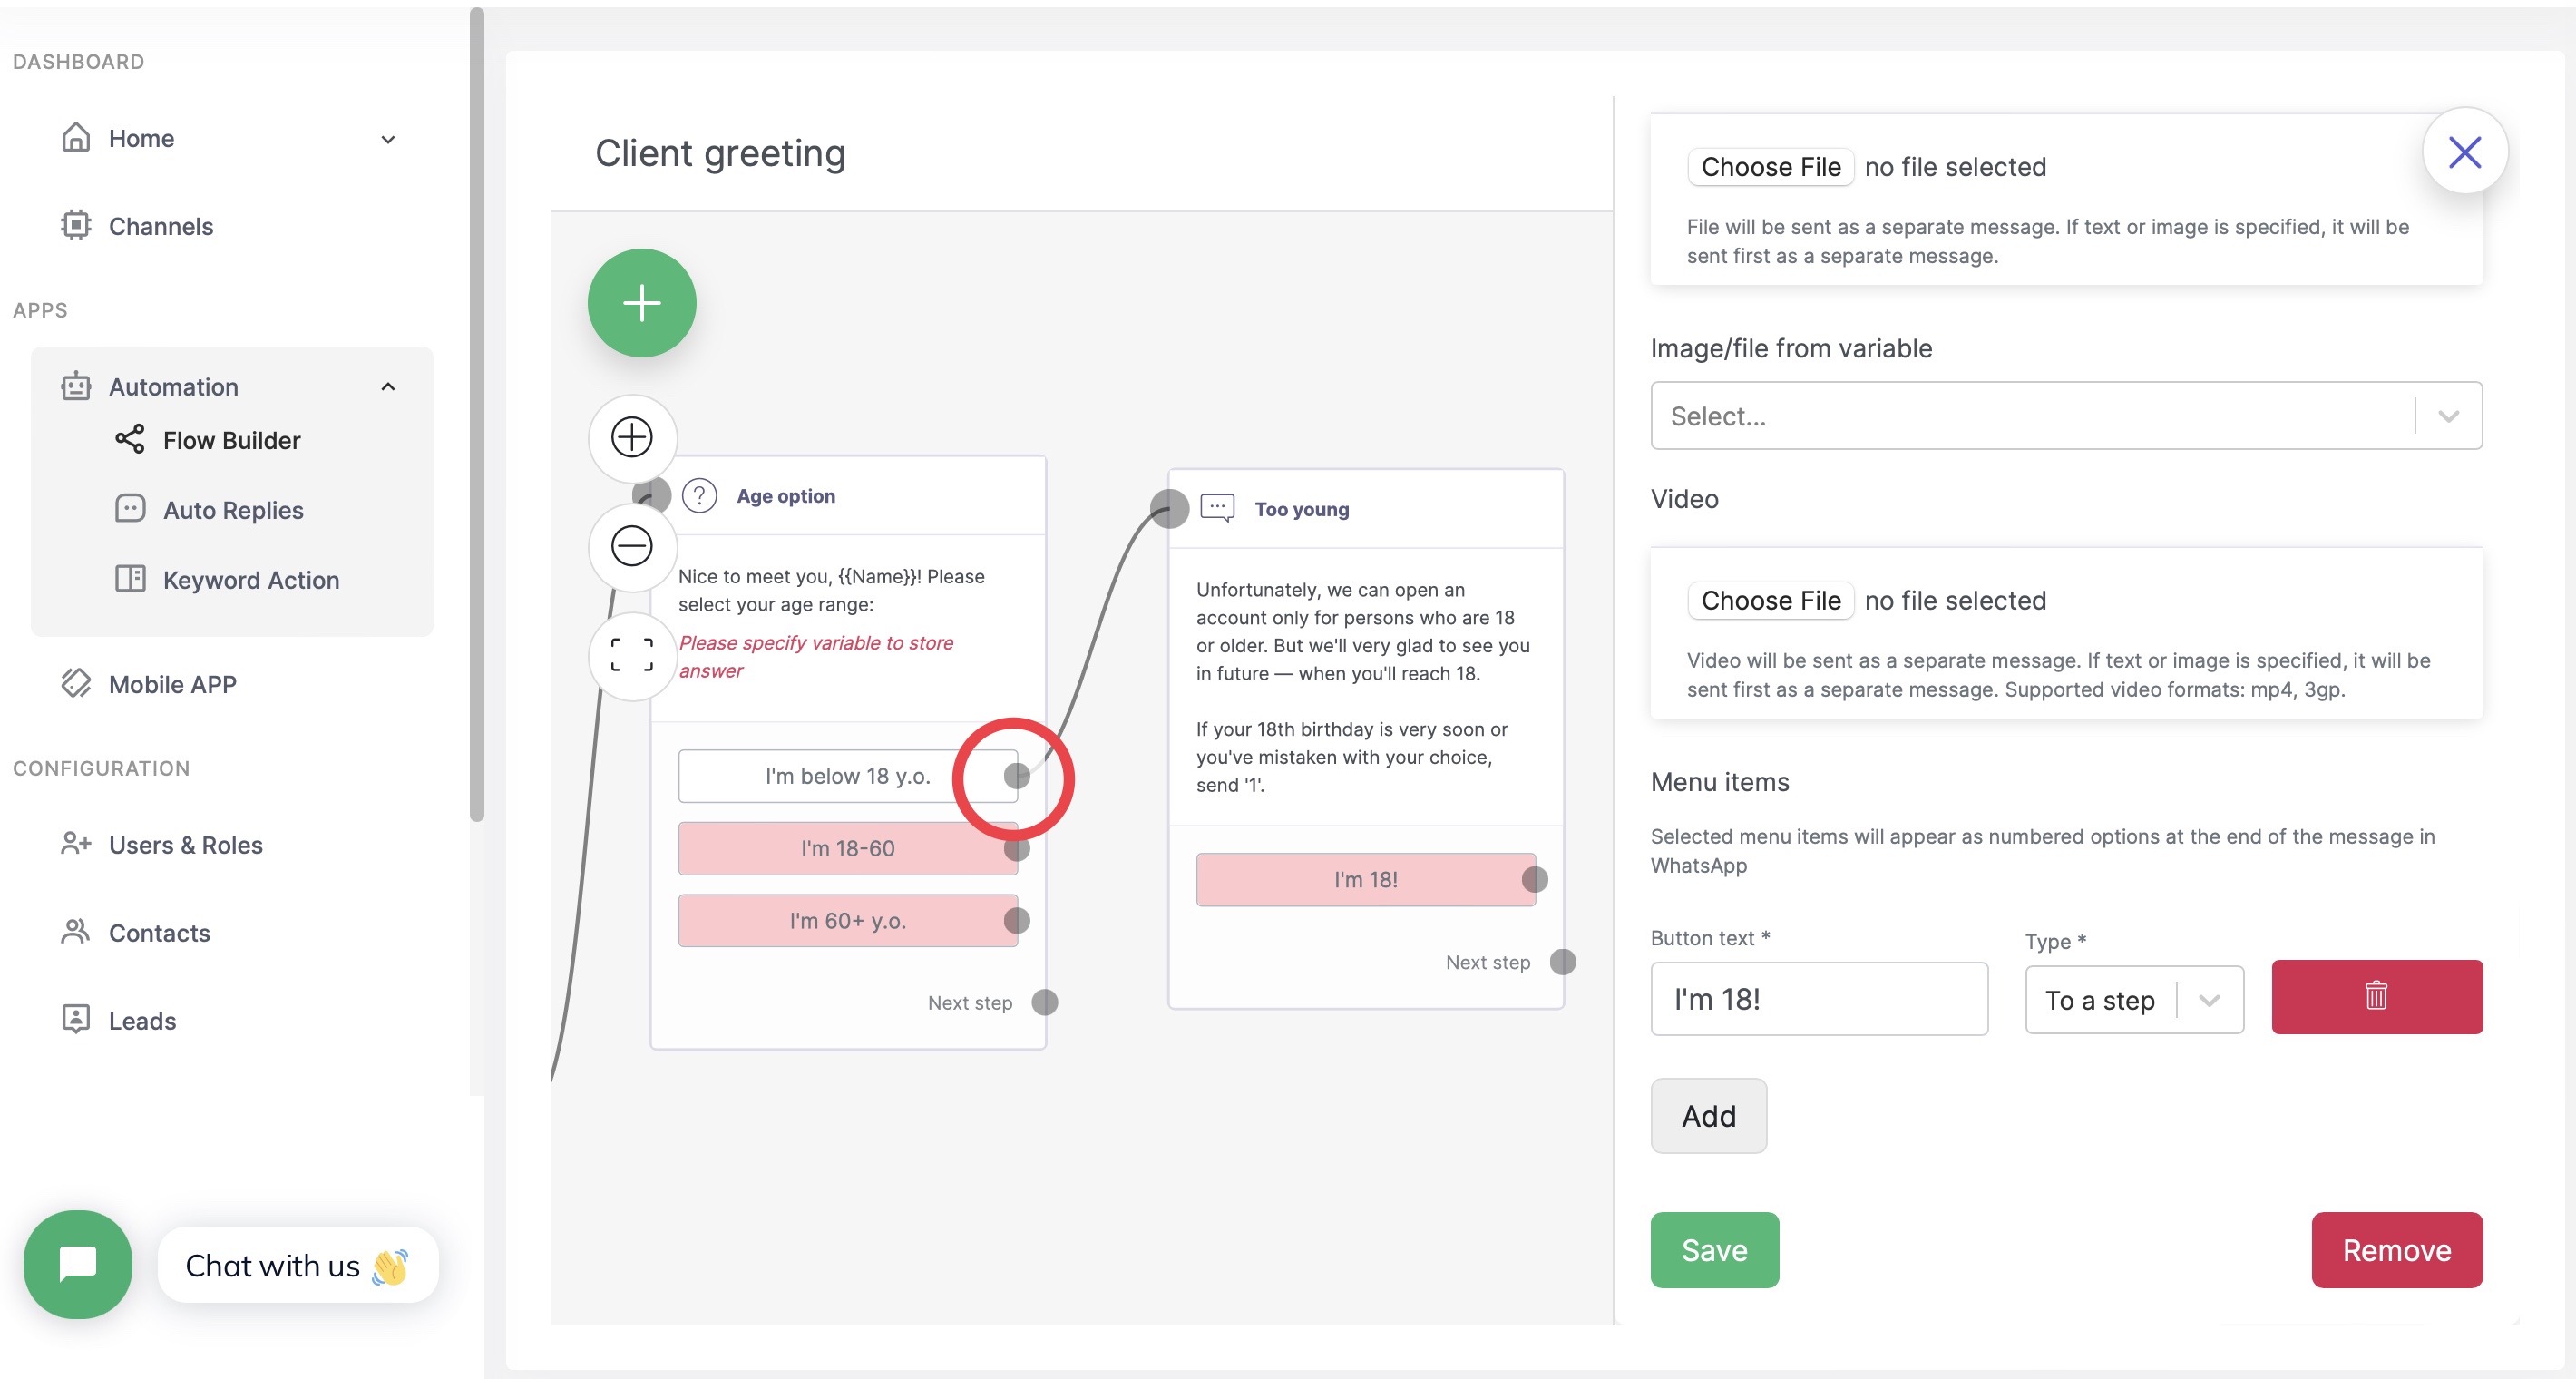
Refusal step
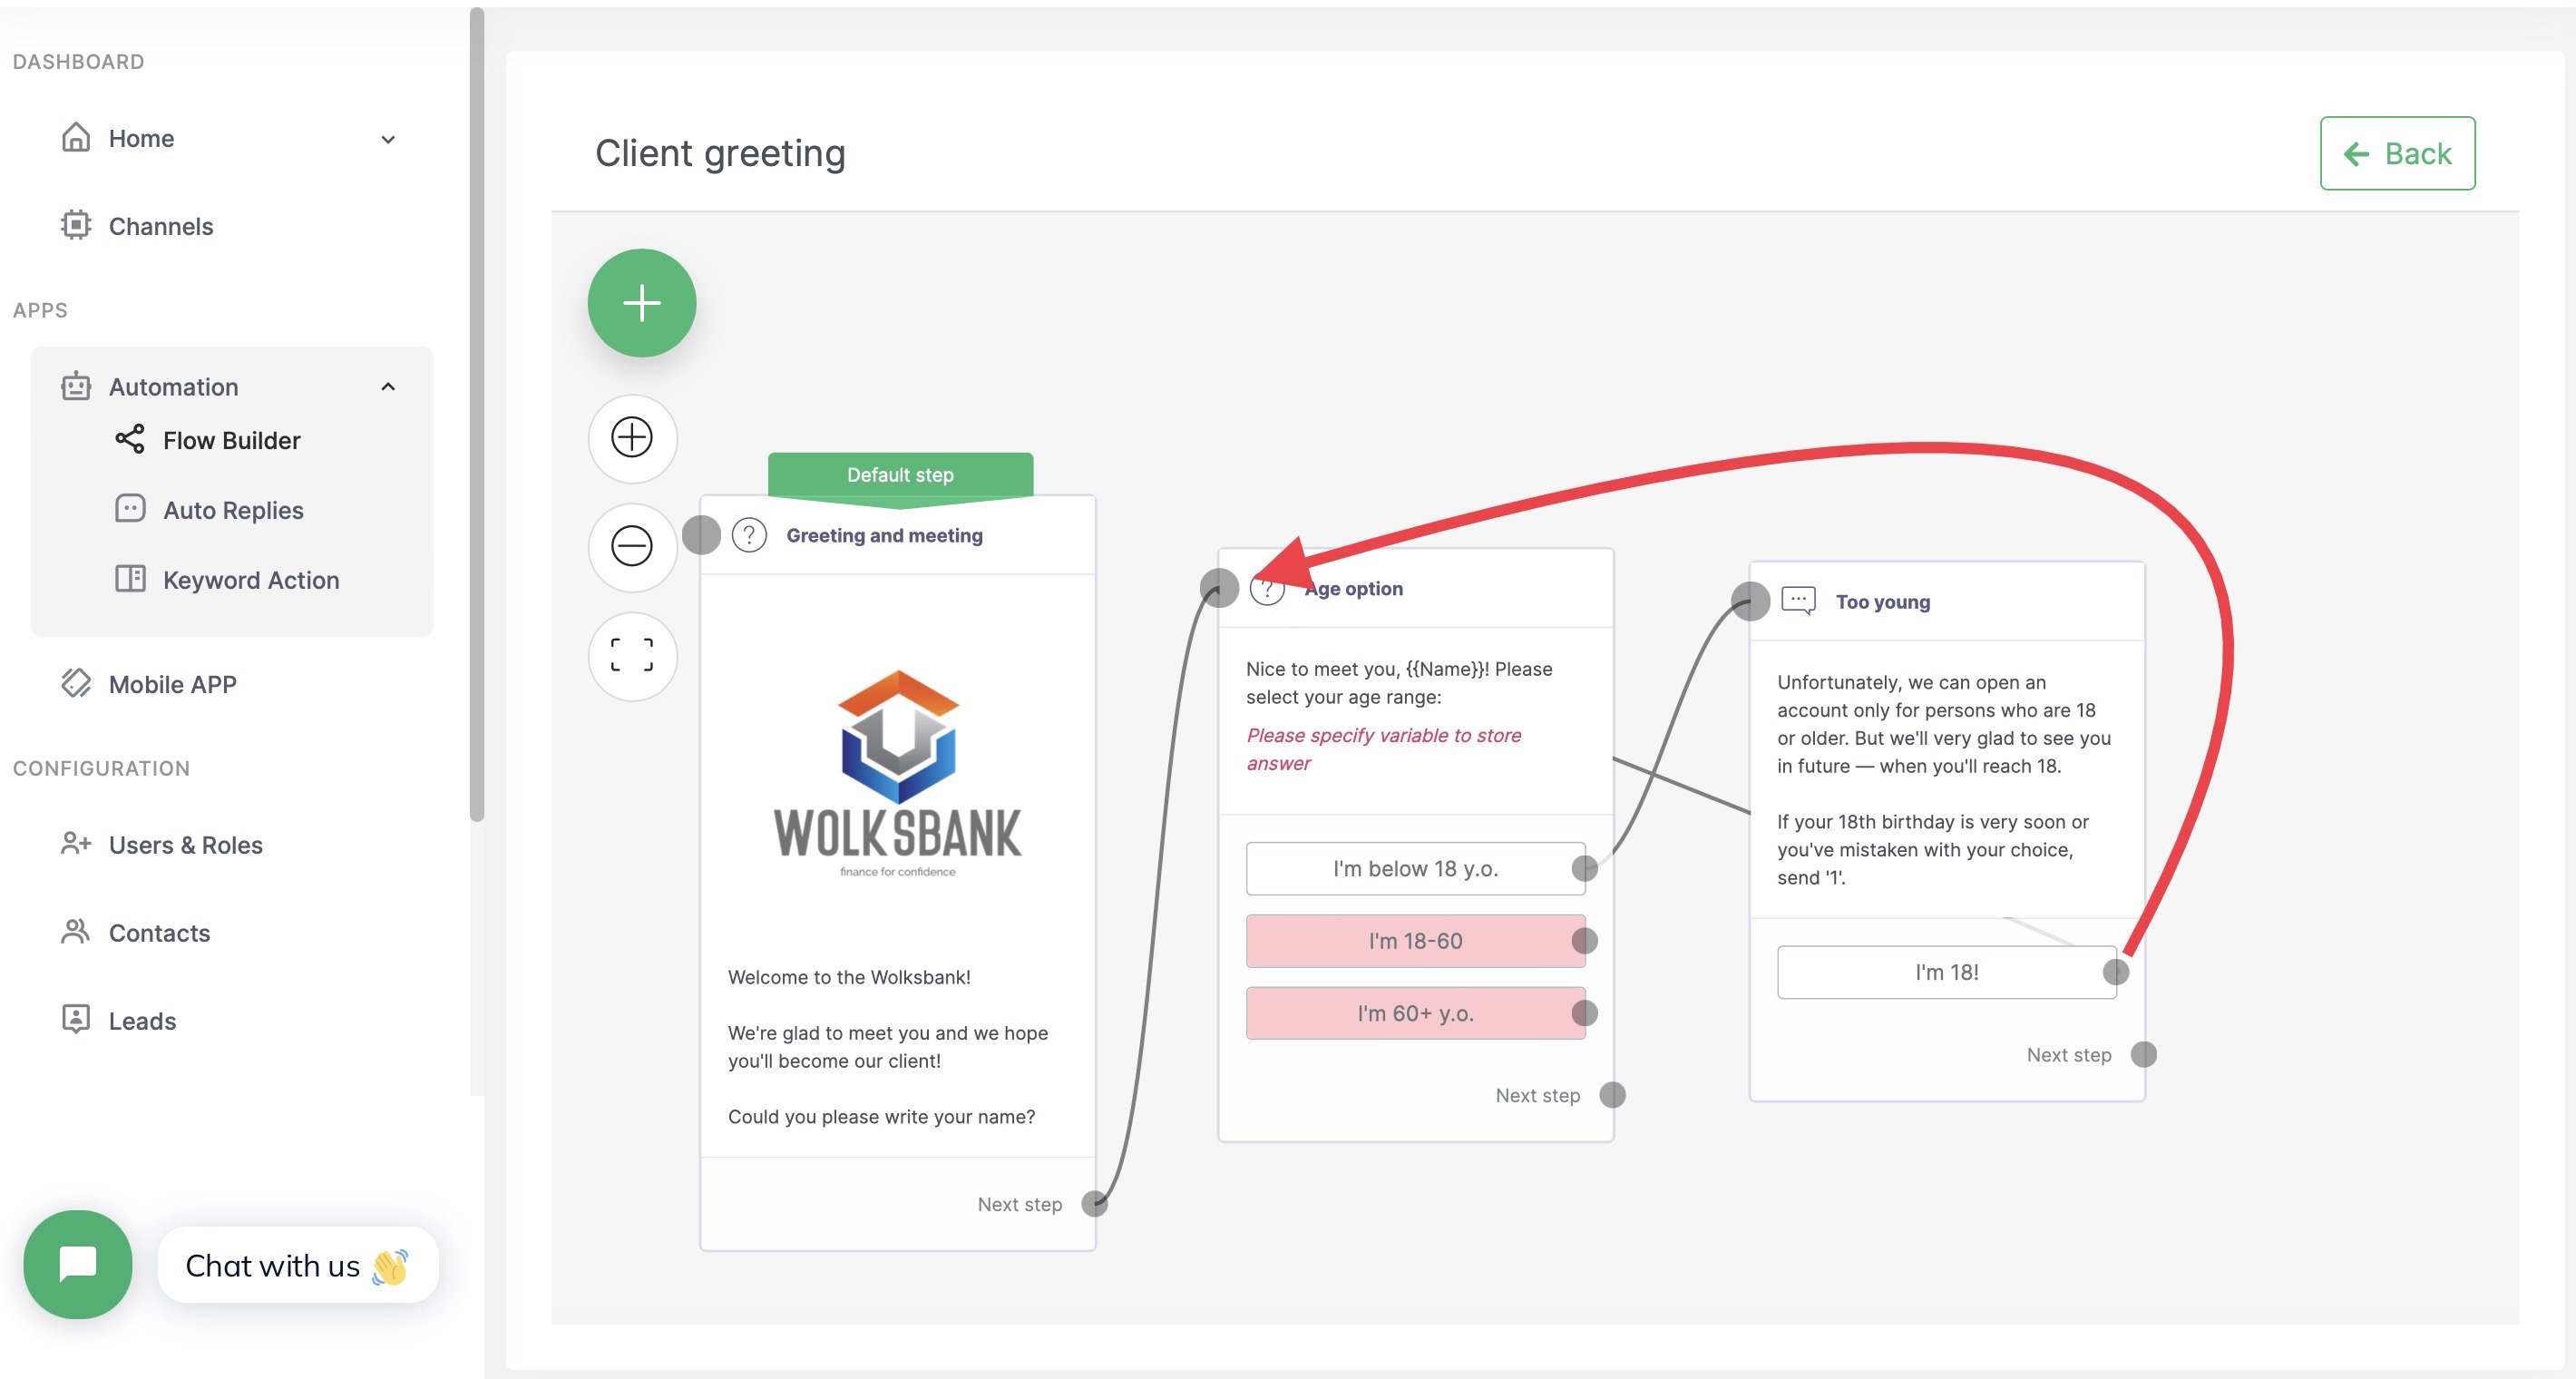
Step repeat
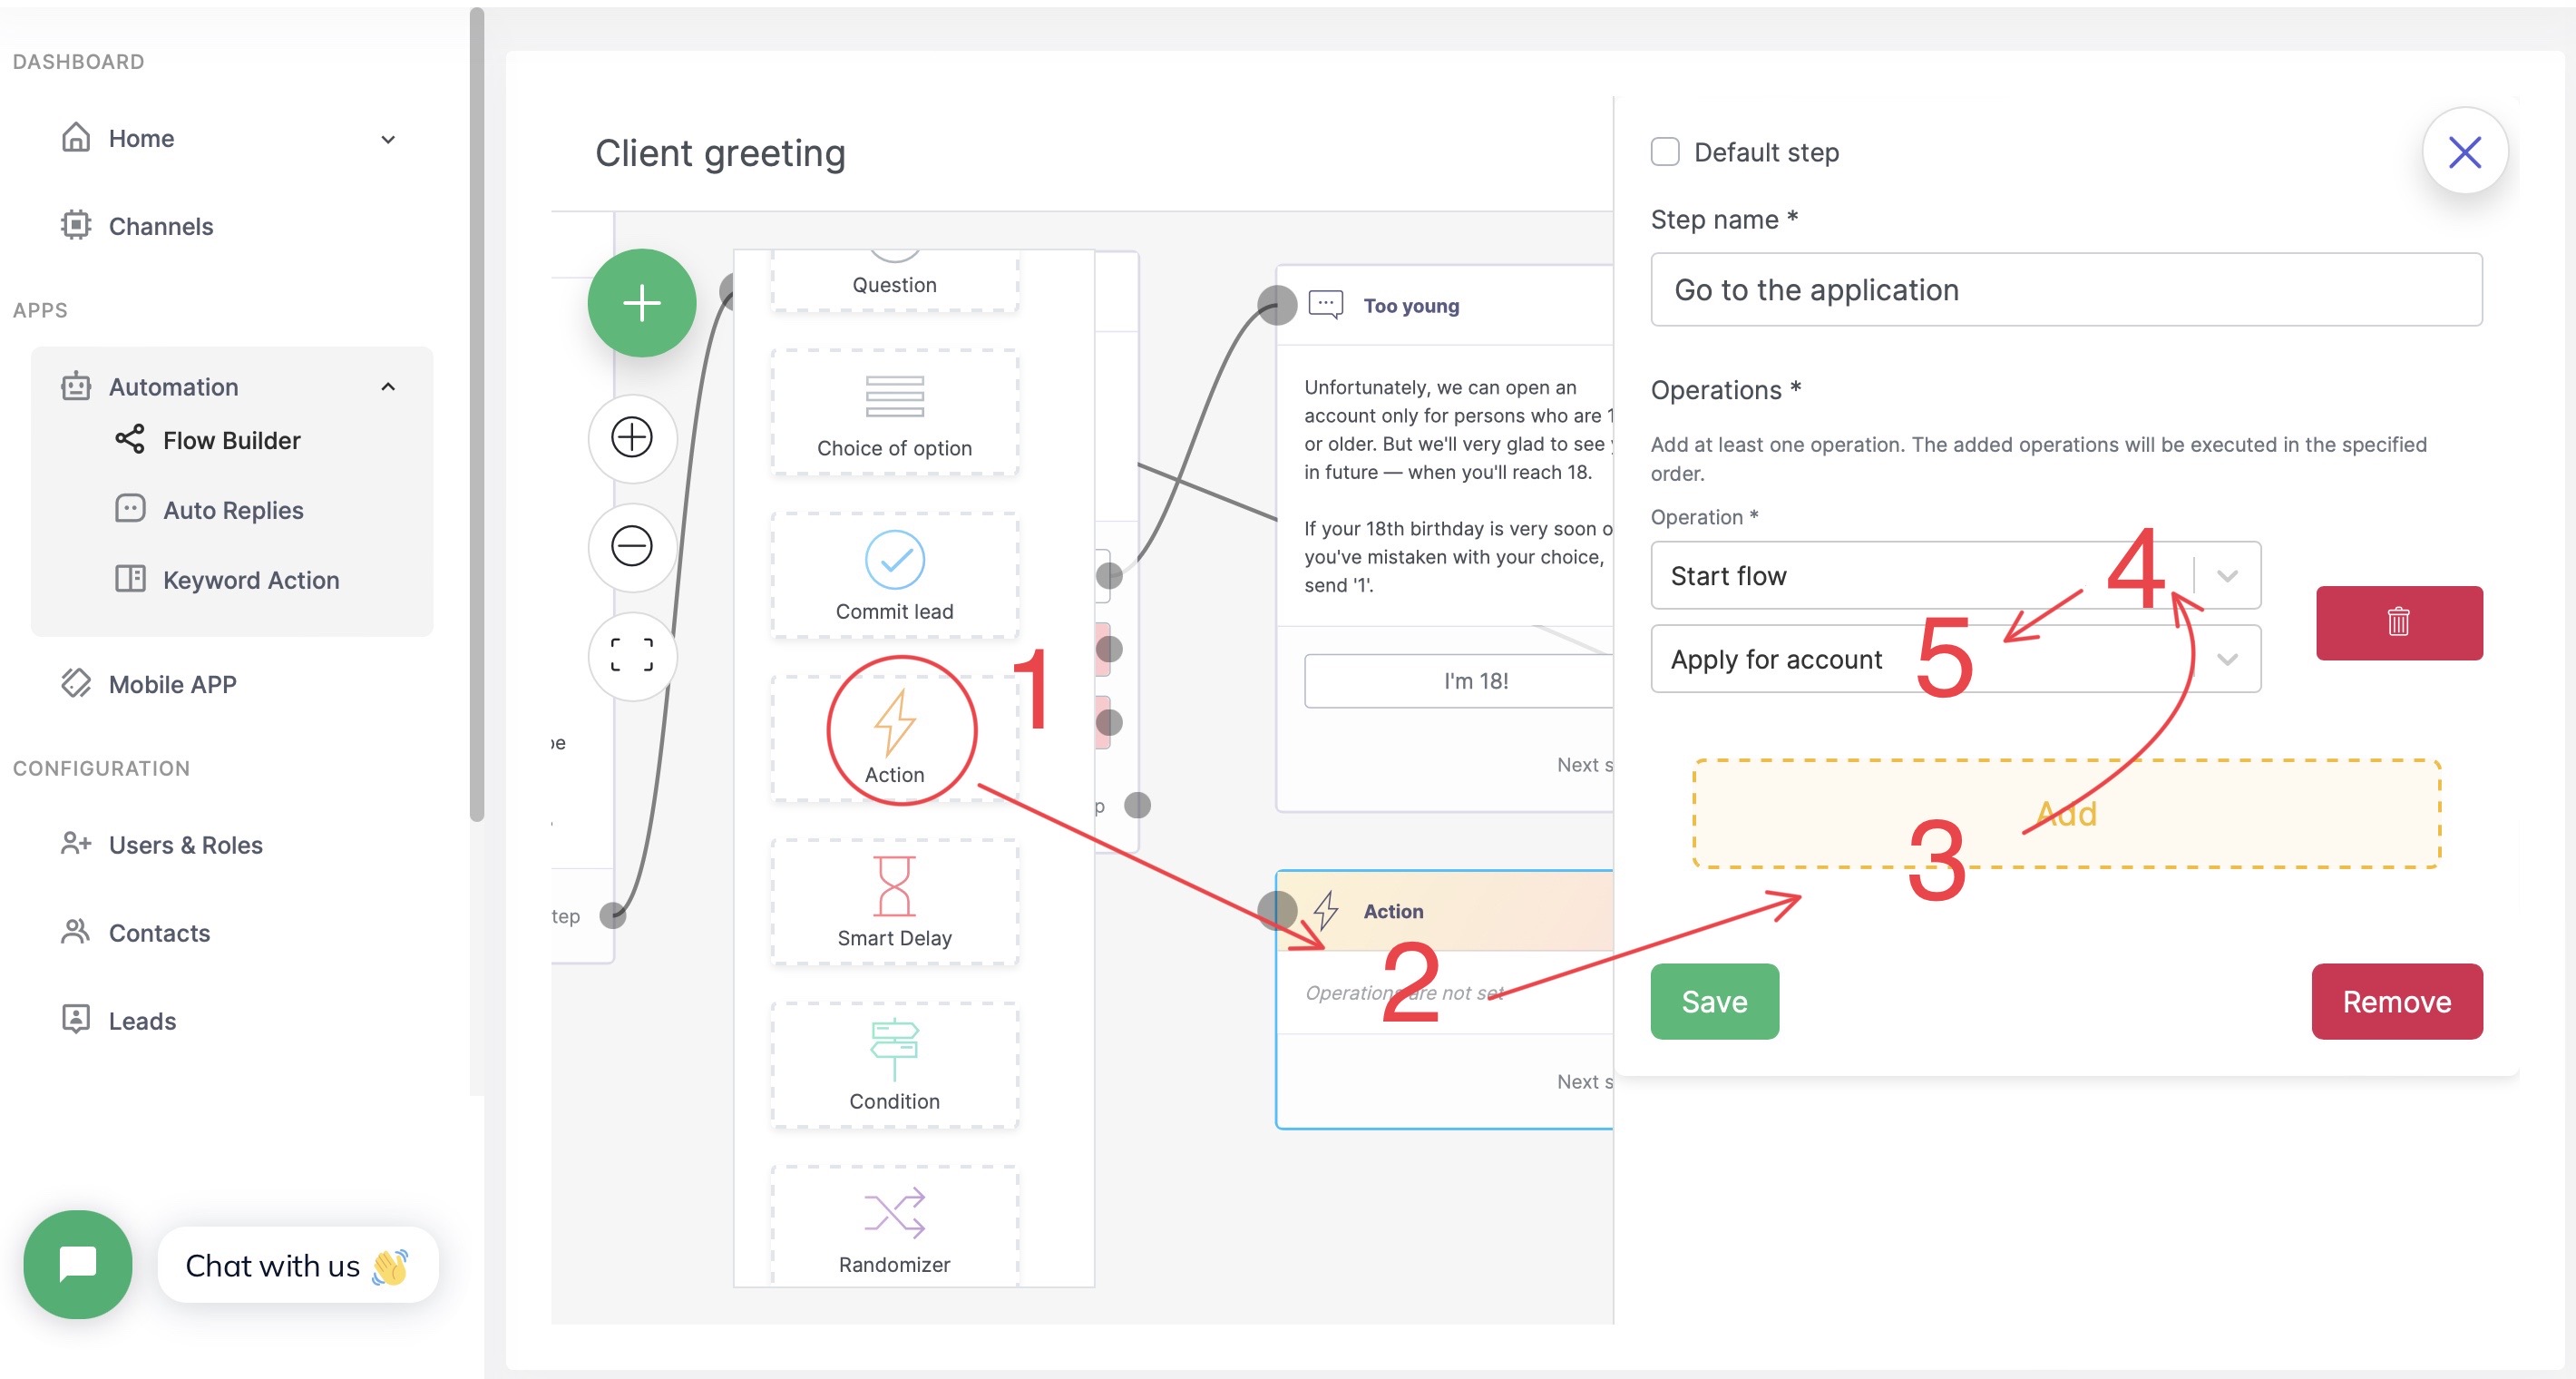
Adding Action step
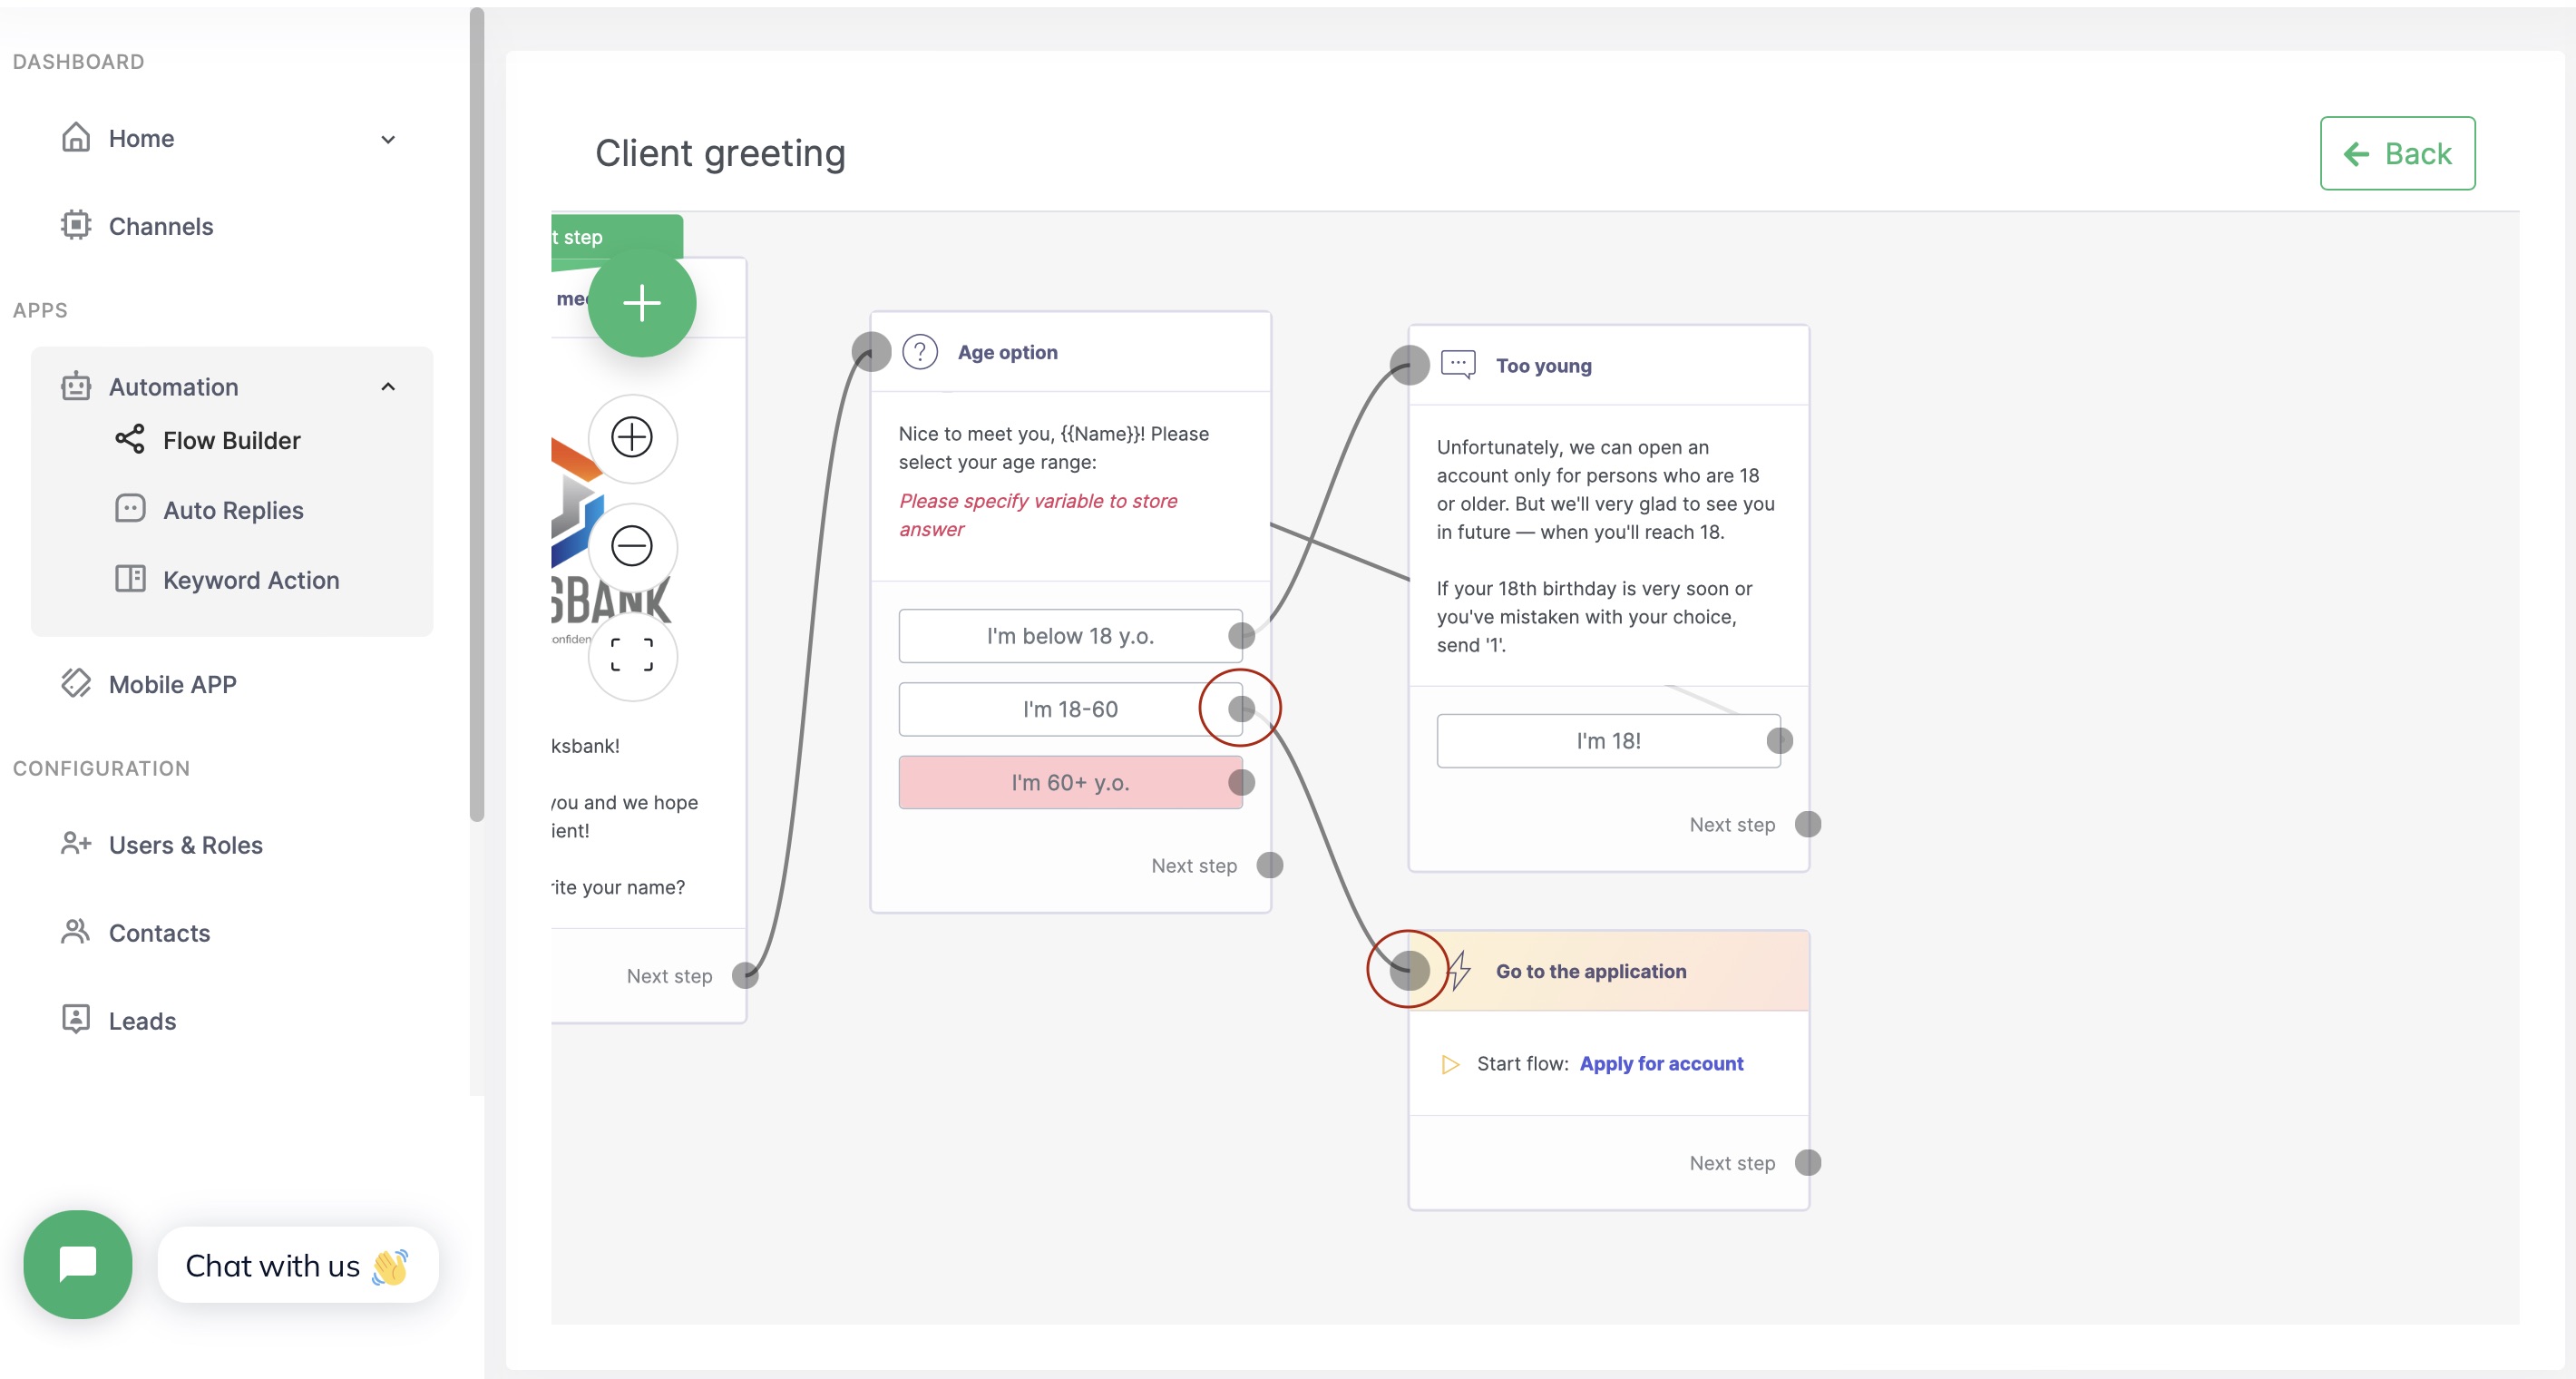
Making a connection
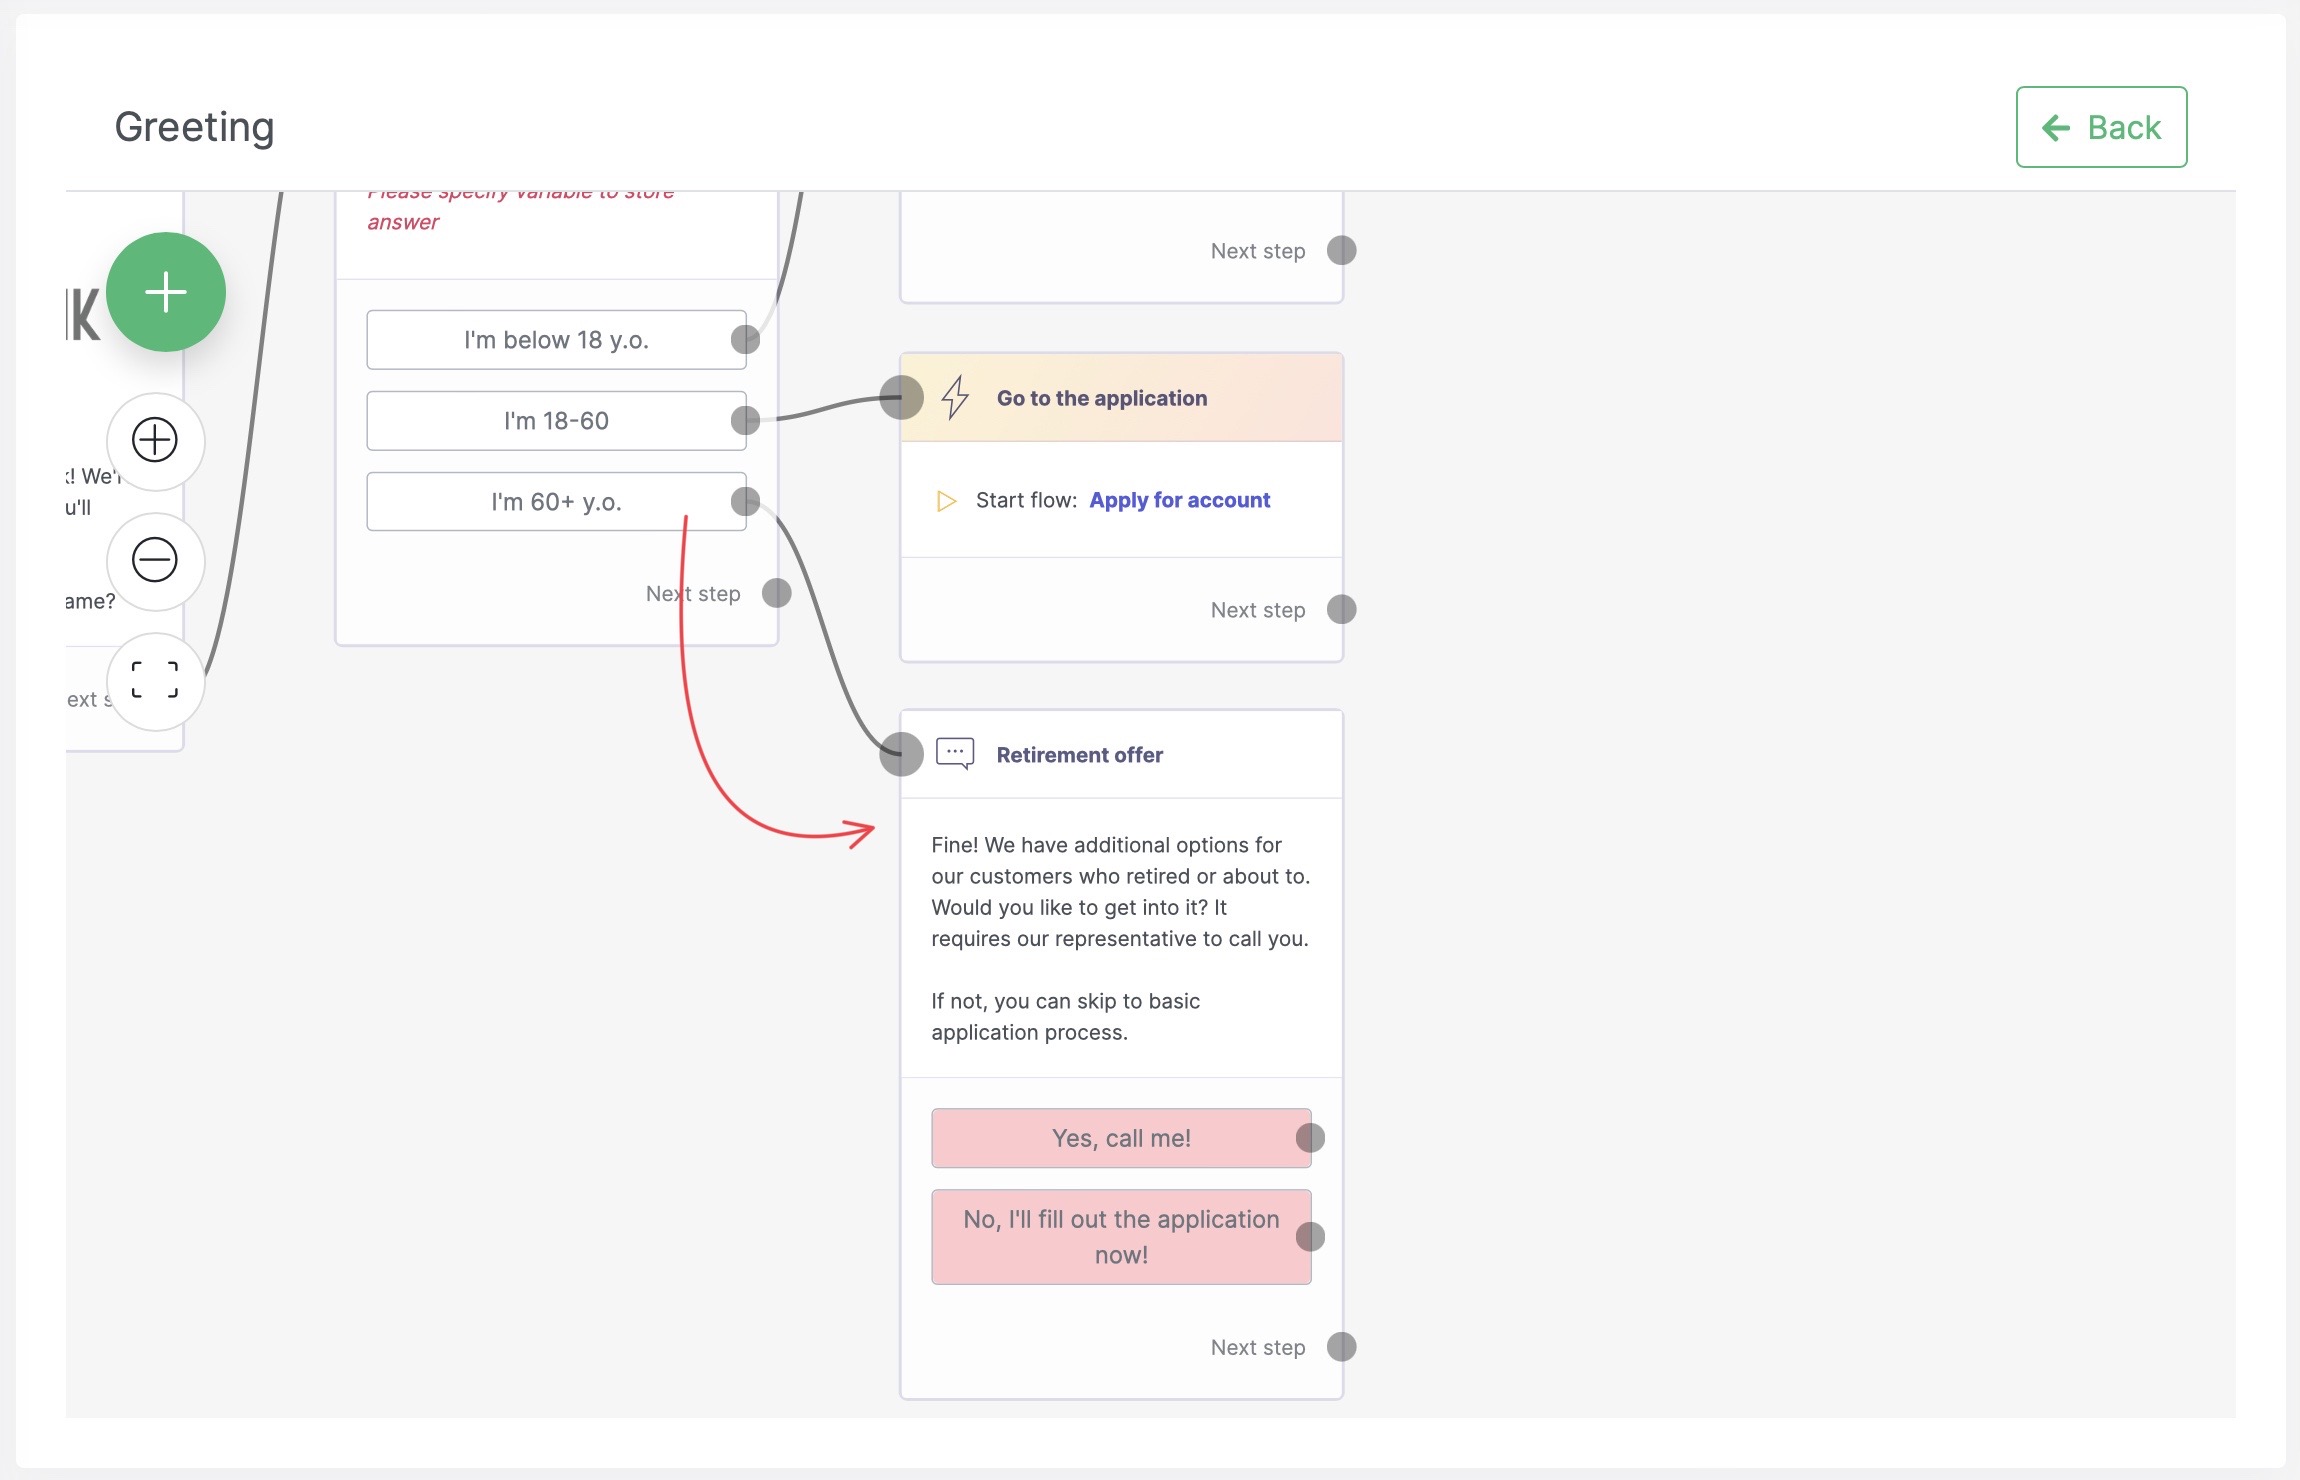
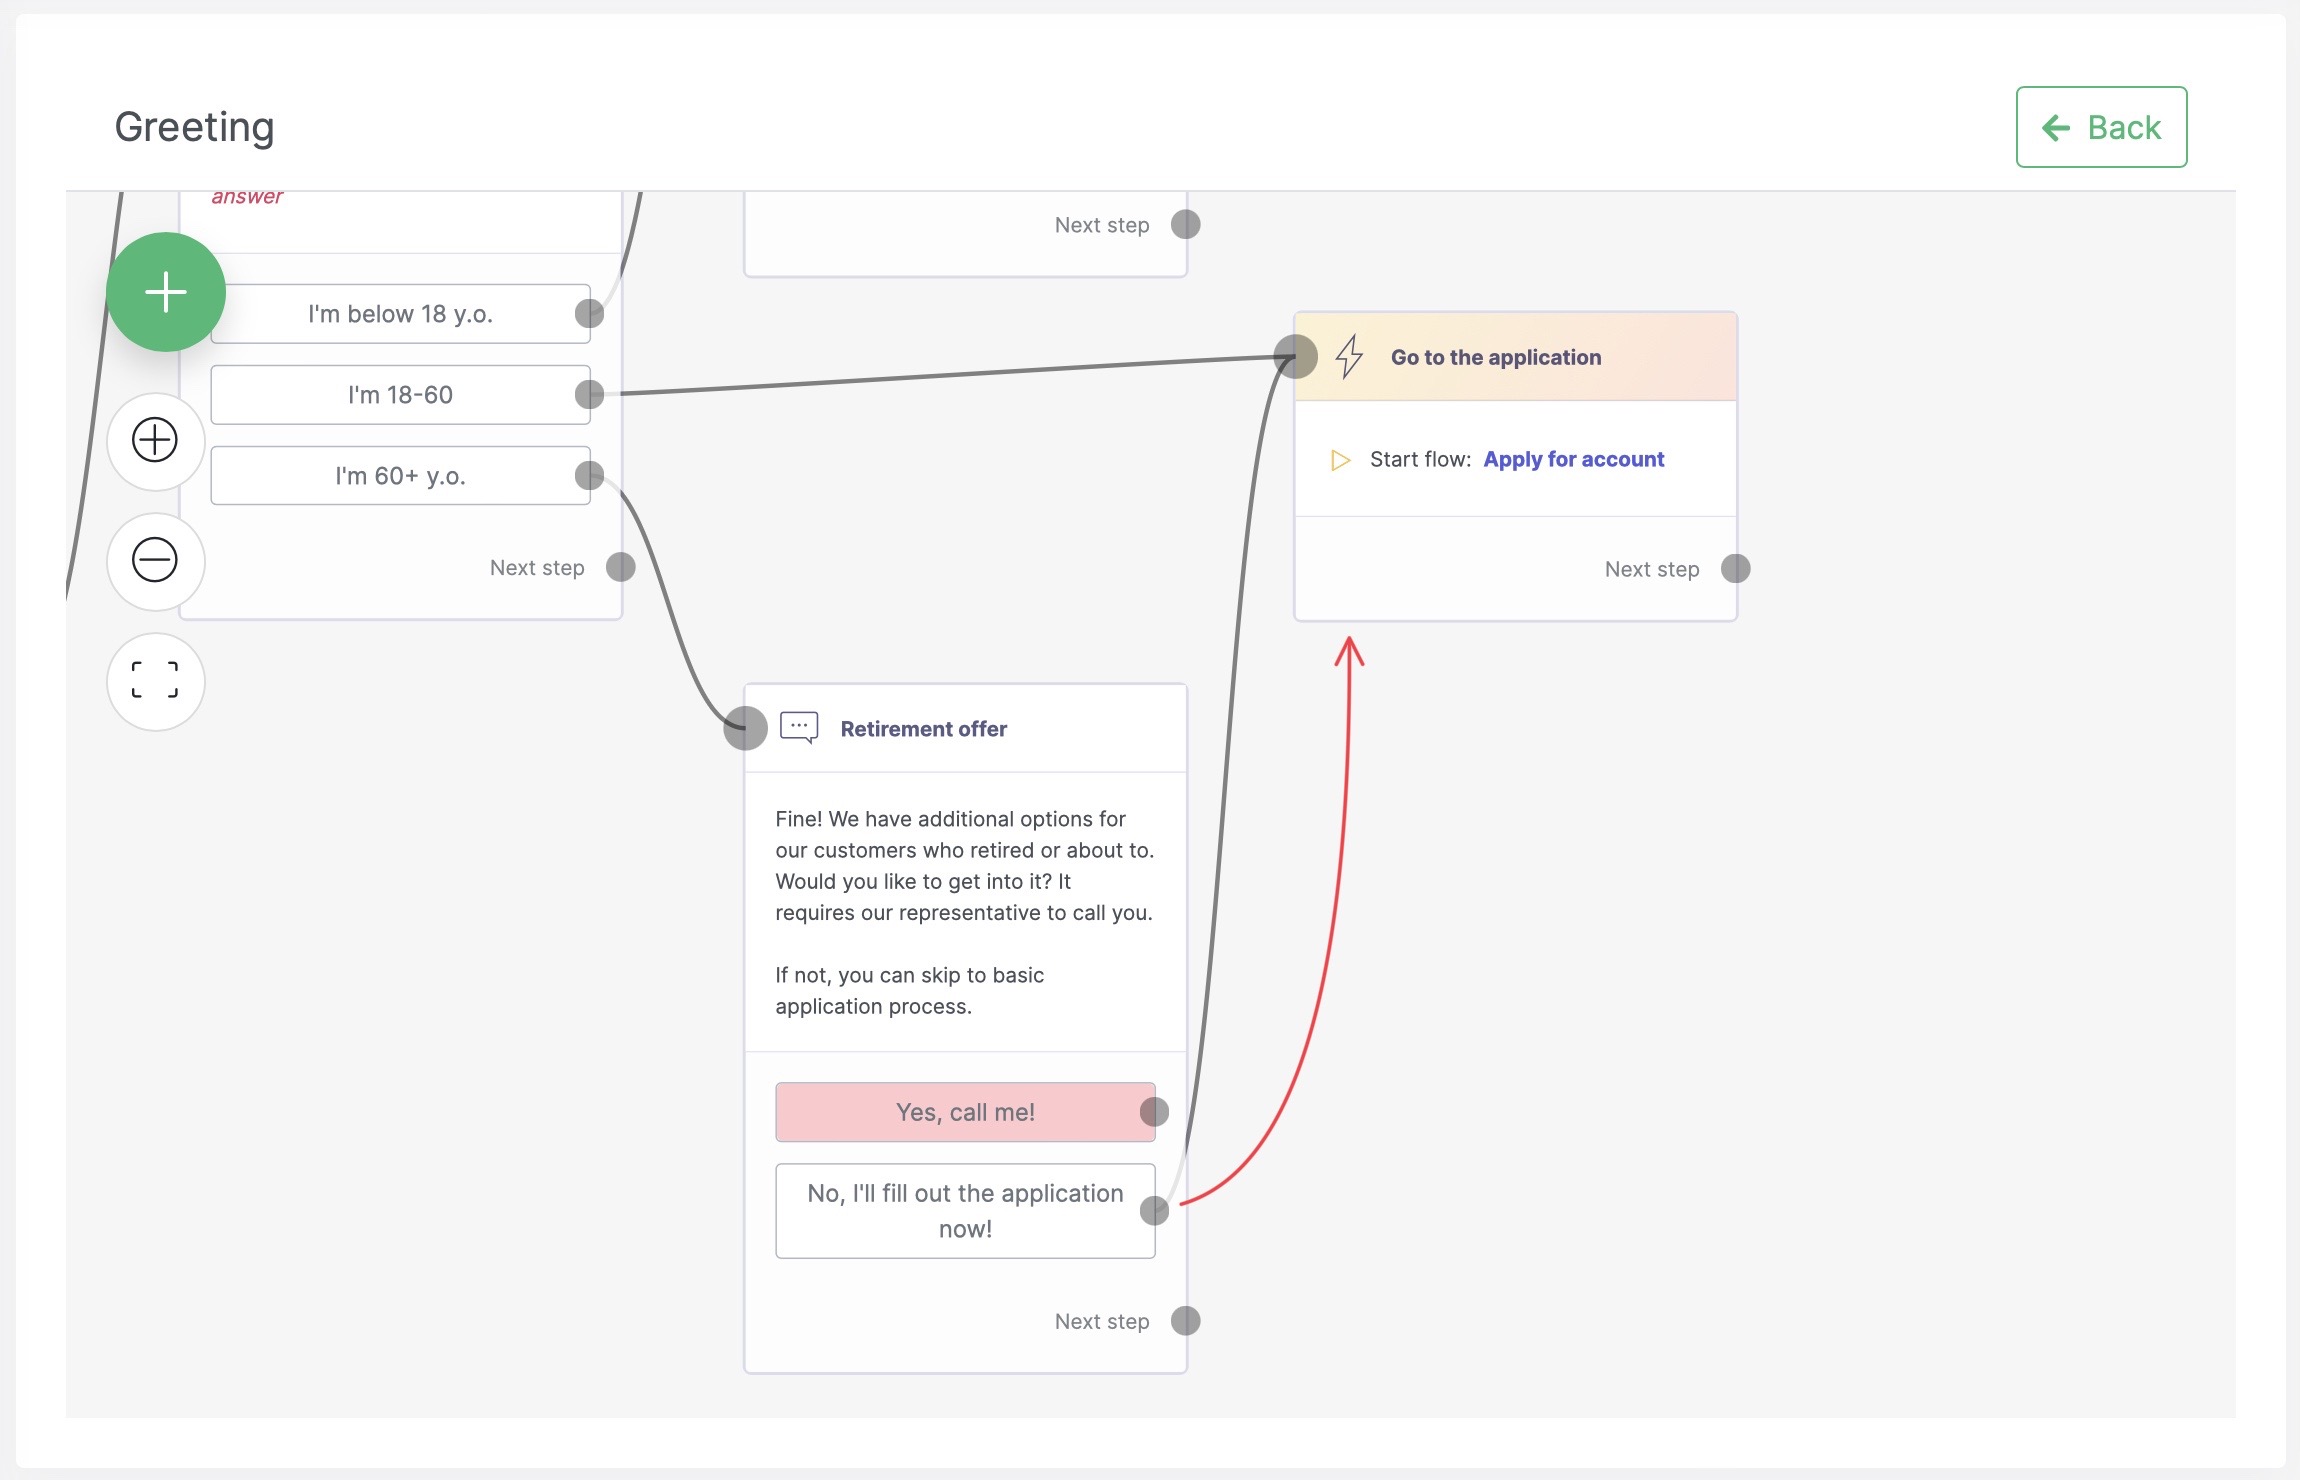
Connect to the same block
Adding Commit lead step block
Commit lead block settings
Scenario overview